Anna's Basket — Mexican Style Street Corn

Mexican Style Street Corn


Celebrate Sweet Corn Season with Mexican Style Street Corn!

There’s nothing quite like biting into a fresh, crunchy cob of Ontario sweet corn at its peak. While sweetcorn is delightful on its own, sometimes it’s fun to mix things up. This recipe adds a fun and flavorful Mexican twist—perfect enjoyed on the cob or as a creamy, tangy dip with fresh toppings.

Savor summer’s sweetest treat at its very best!

INGREDIENTS (Serves 12)

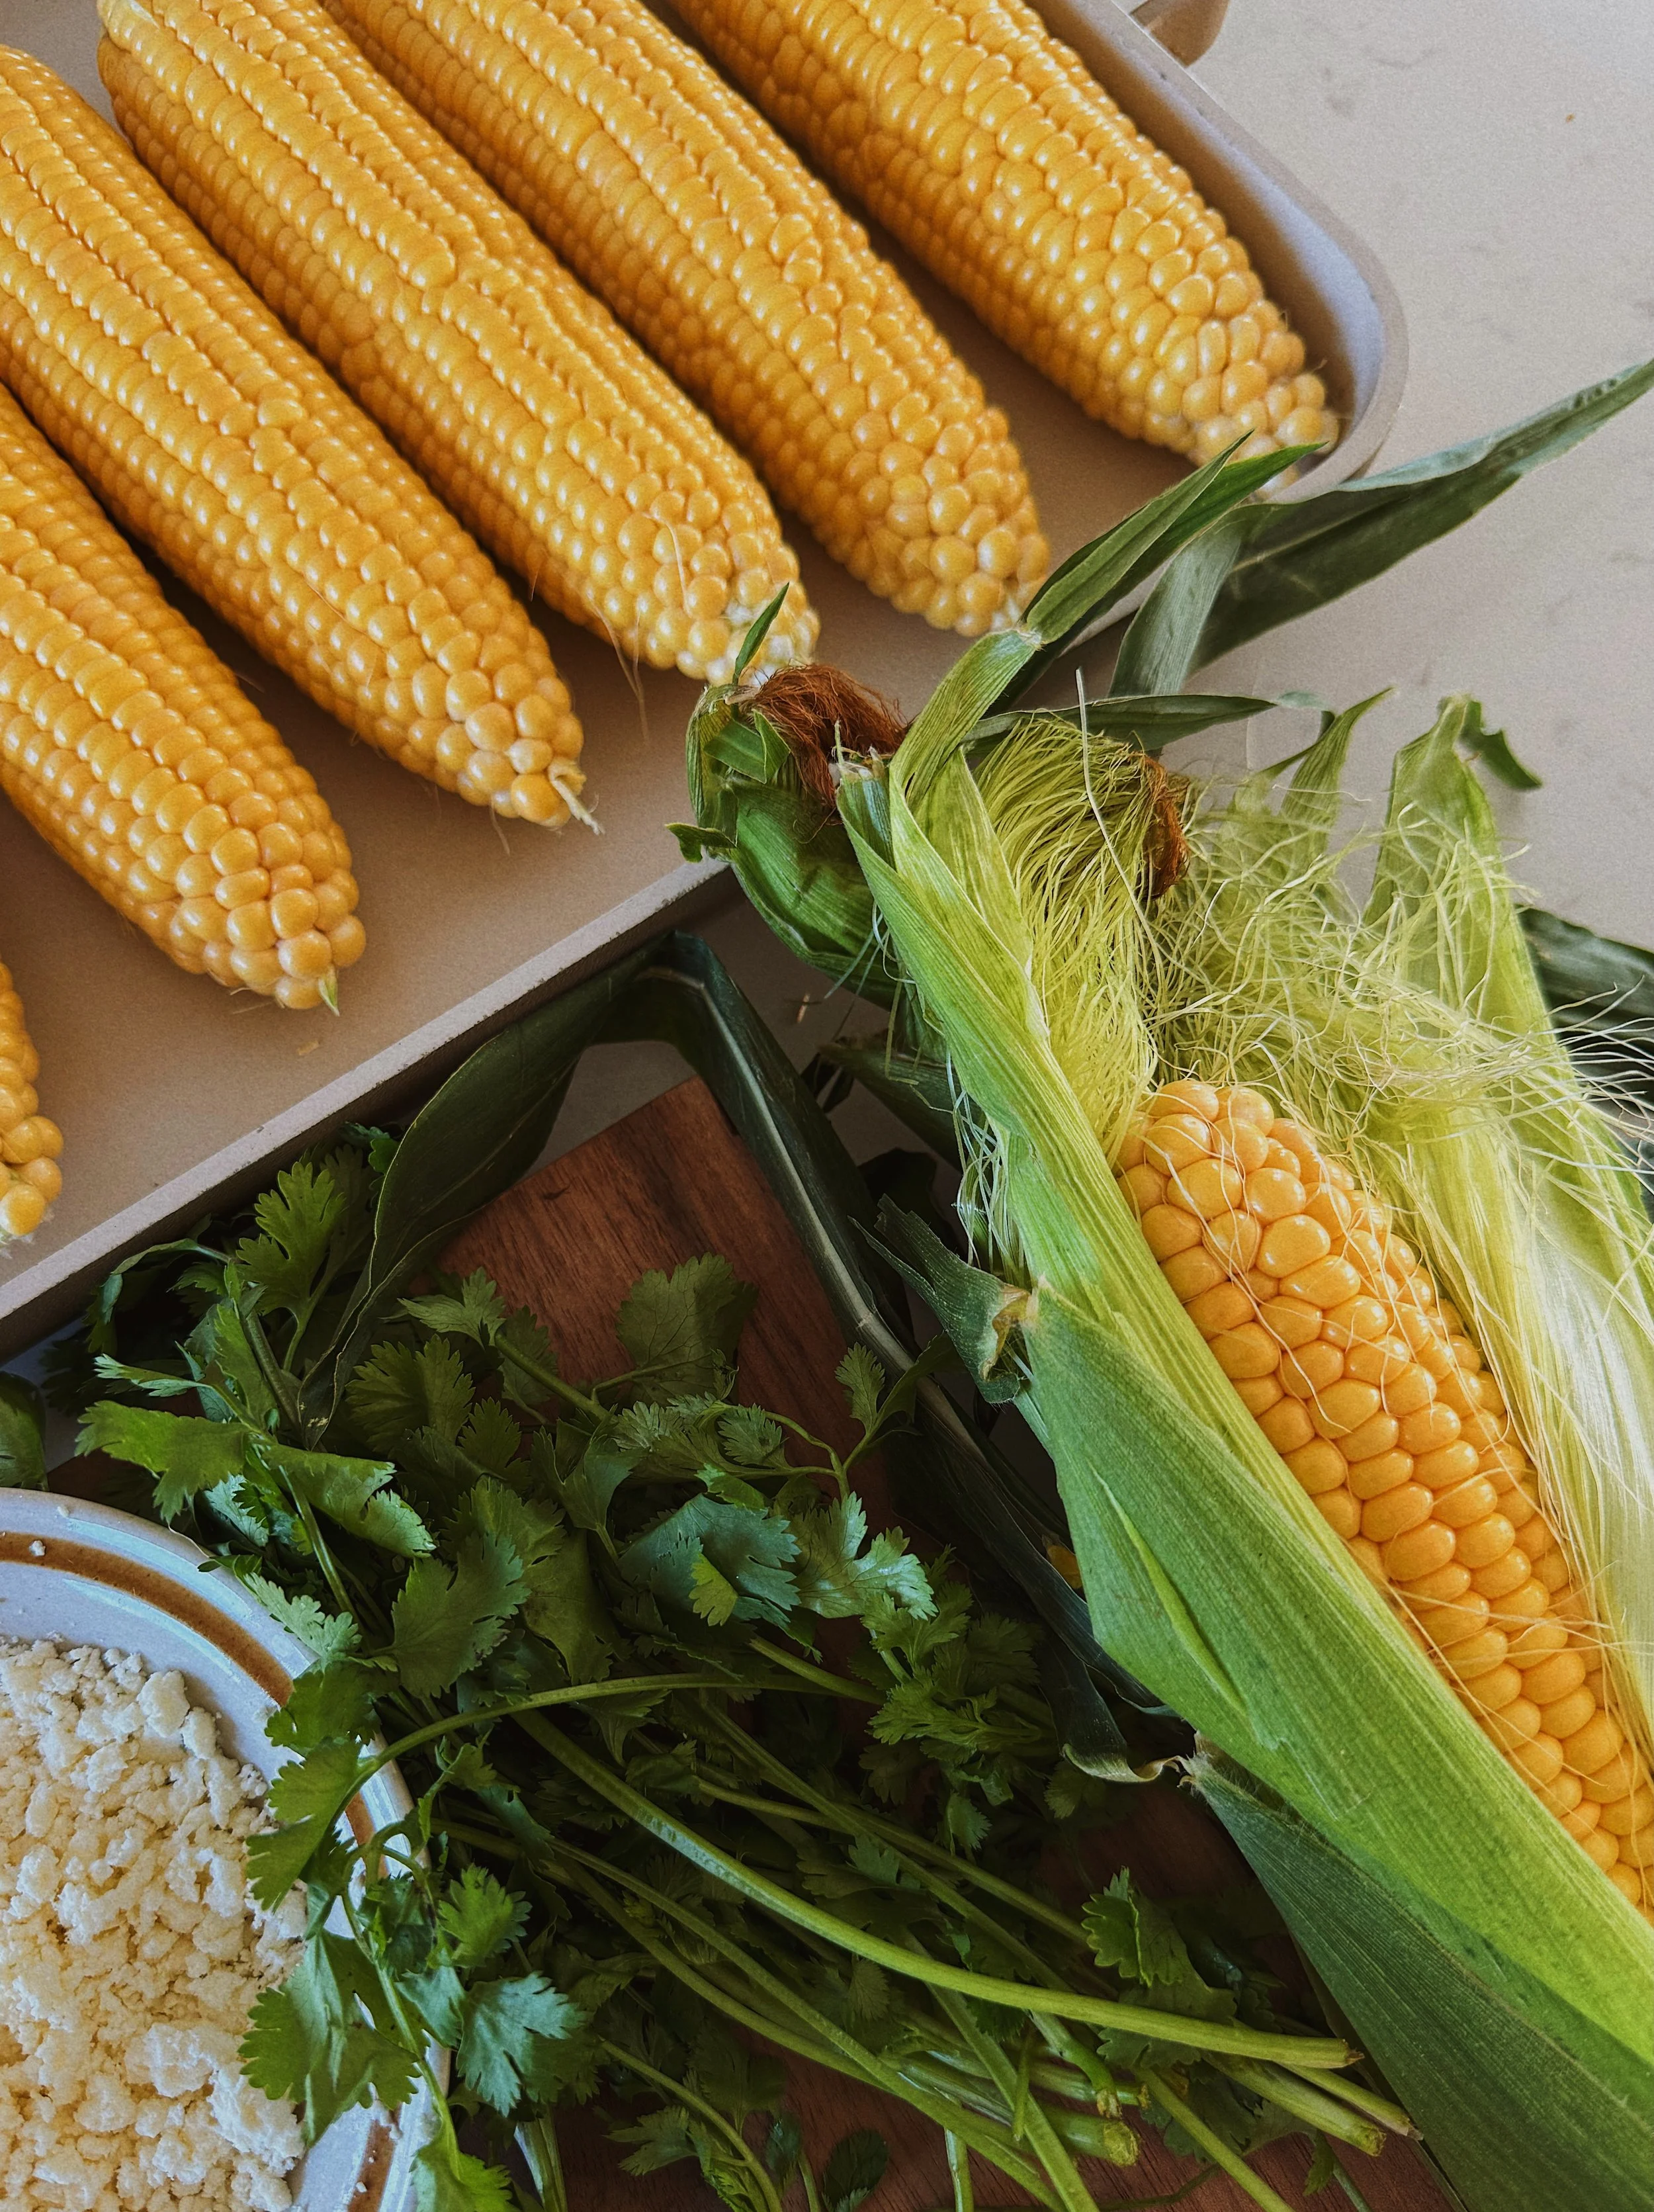
12 fresh corn cobs, husked

3 tbsp olive oil
Salt and pepper, to taste (for seasoning the corn)

Crema
1 cup mayonnaise
1 ½ cups 5% plain Greek yogurt
1 cup feta or cotija cheese, crumbled
1-2 cloves garlic, minced
1/2 tsp ground cumin
1/2 tsp ground coriander
1-2 tsp chili powder (depending how flavourful you want it)
1/4 tsp of chipotle powder
1/2 tsp salt (or to taste)
1/4 tsp black pepper
Juice of 1 lime (plus lime wedges for serving)
¼ cup chopped fresh cilantro (plus extra for topping)
½ cup sliced green onions (optional)
½–1 cup fresh or pickled jalapeños, sliced (optional)


Instructions
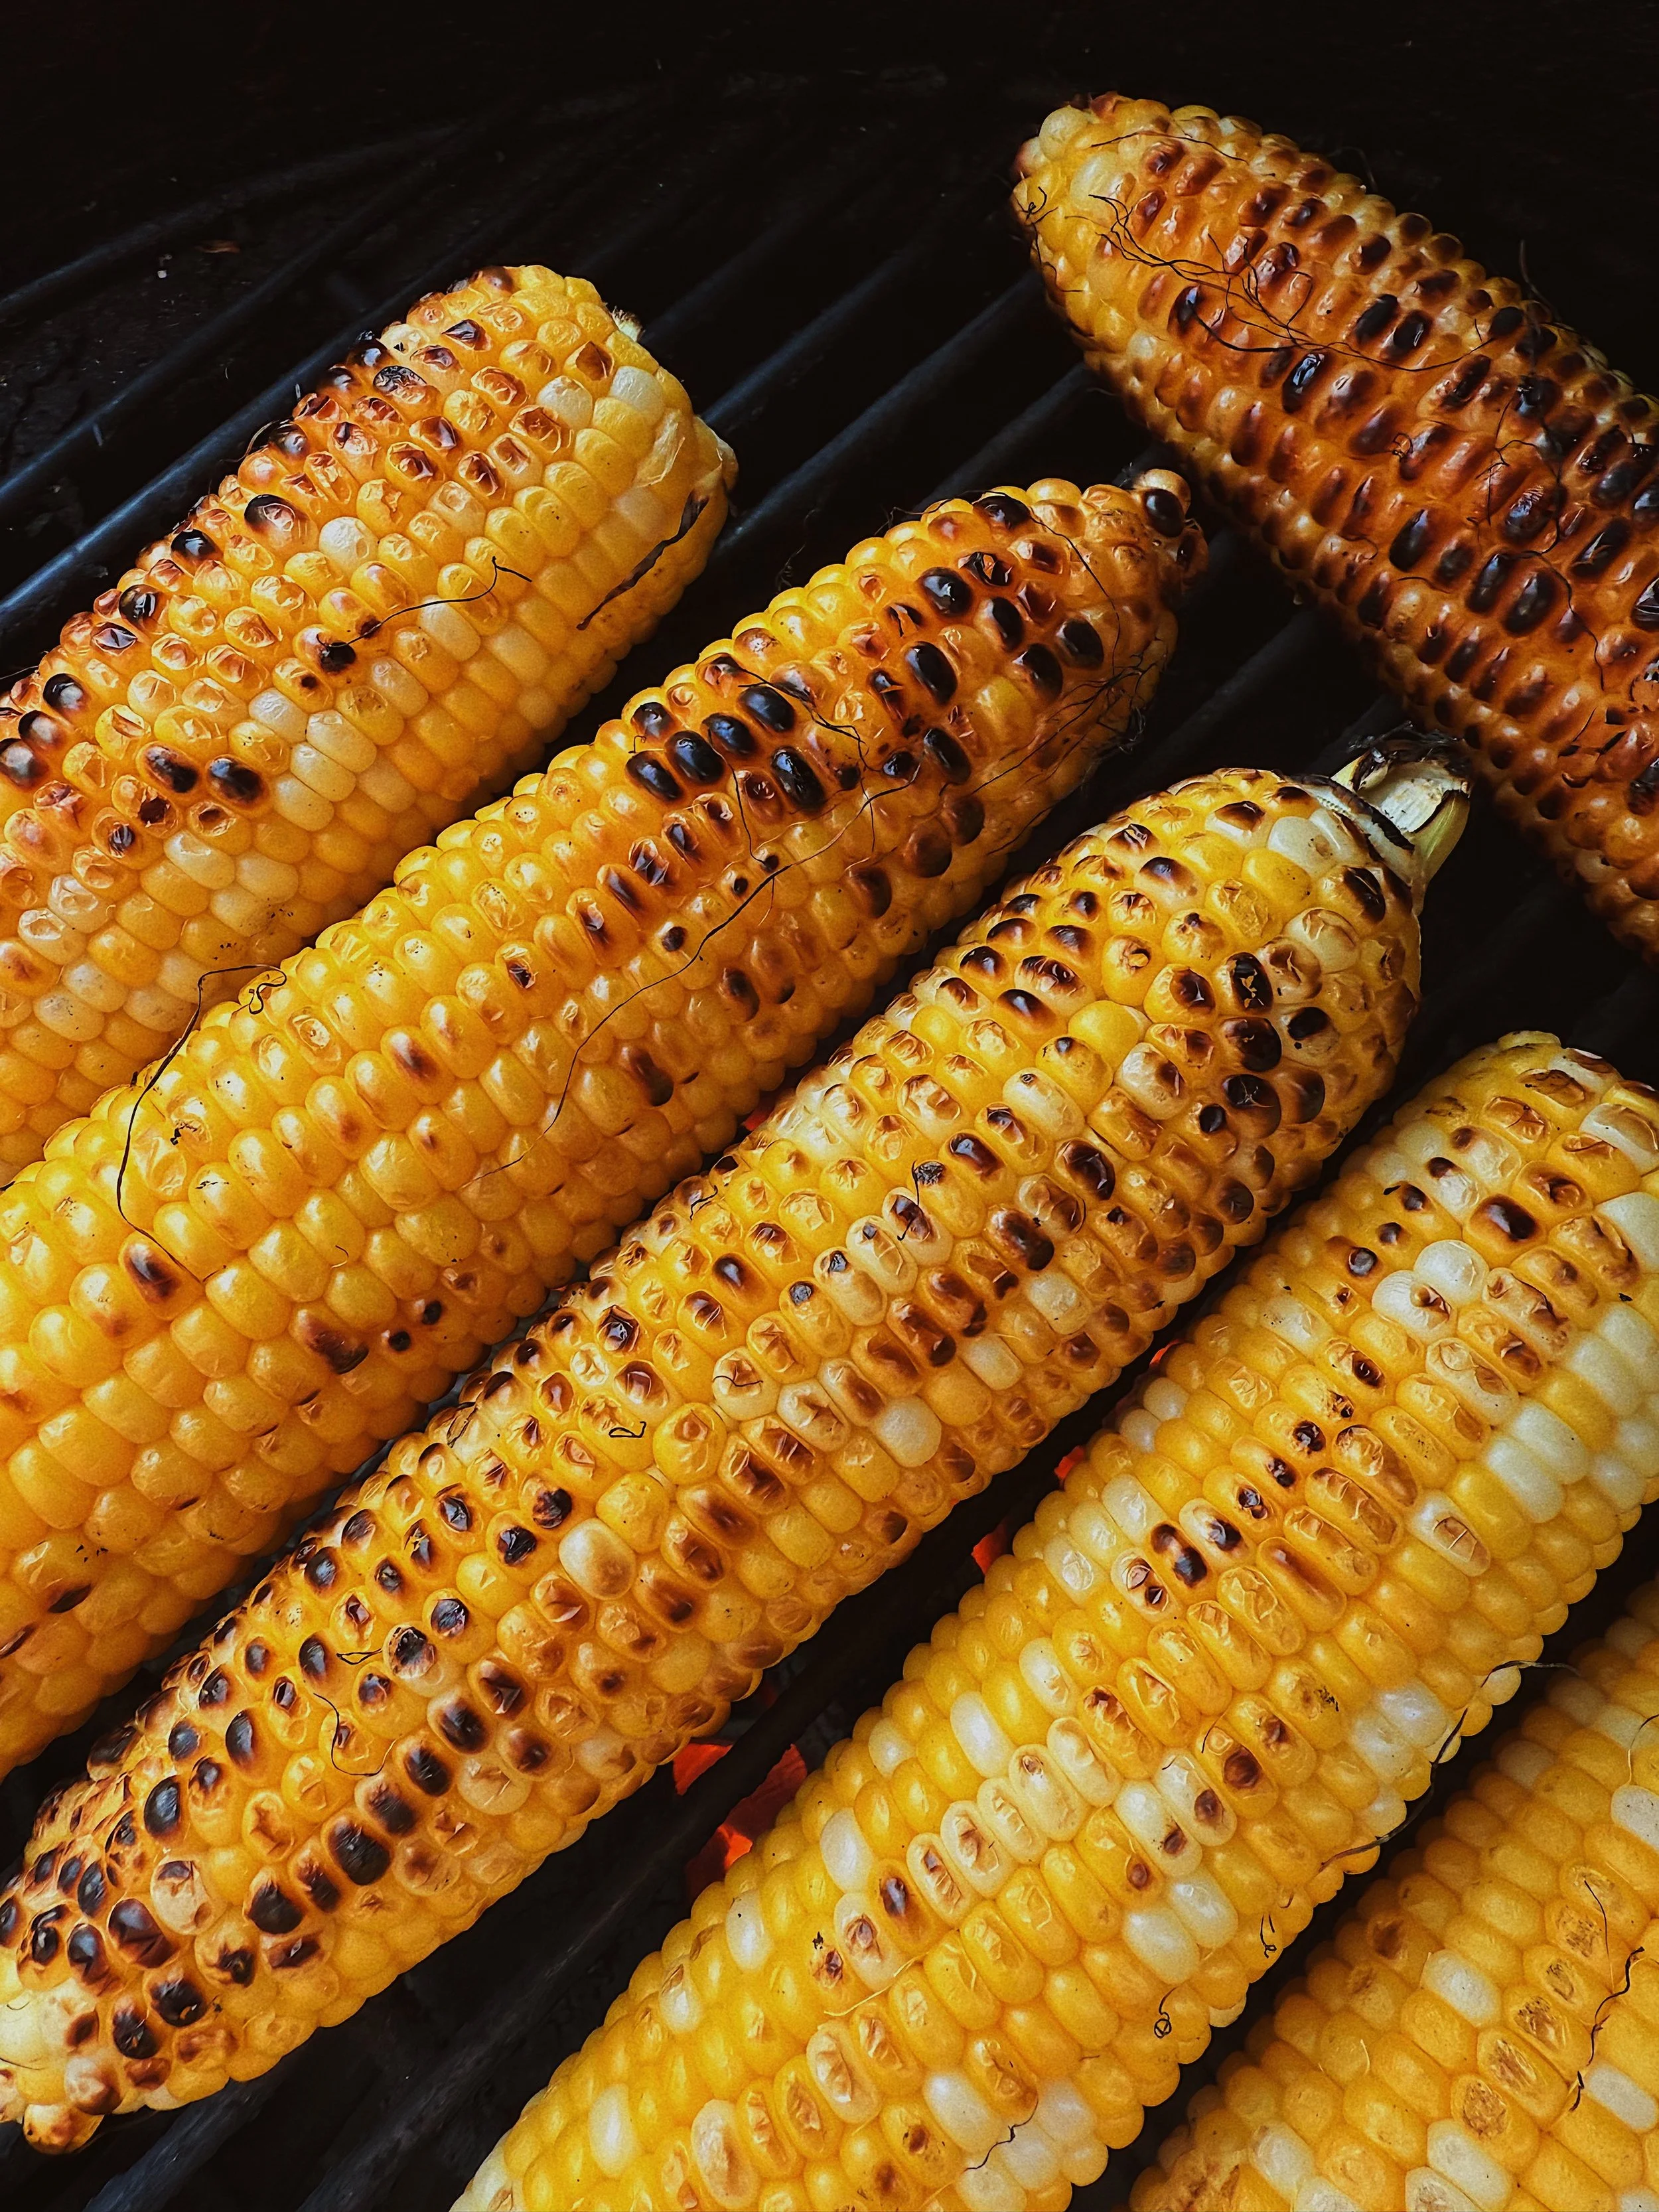
1.    Preheat grill to medium-high heat.
2.    Brush each corn cob with olive oil and season with salt and pepper to taste.
3.    Grill corn, turning every few minutes, until charred and tender (about 10–12 minutes).
4.    In a bowl, whisk together Greek yogurt, mayonnaise, garlic, lime juice, chili powder, adobo chili powder, cumin, coriander, salt, and black pepper to make the crema.
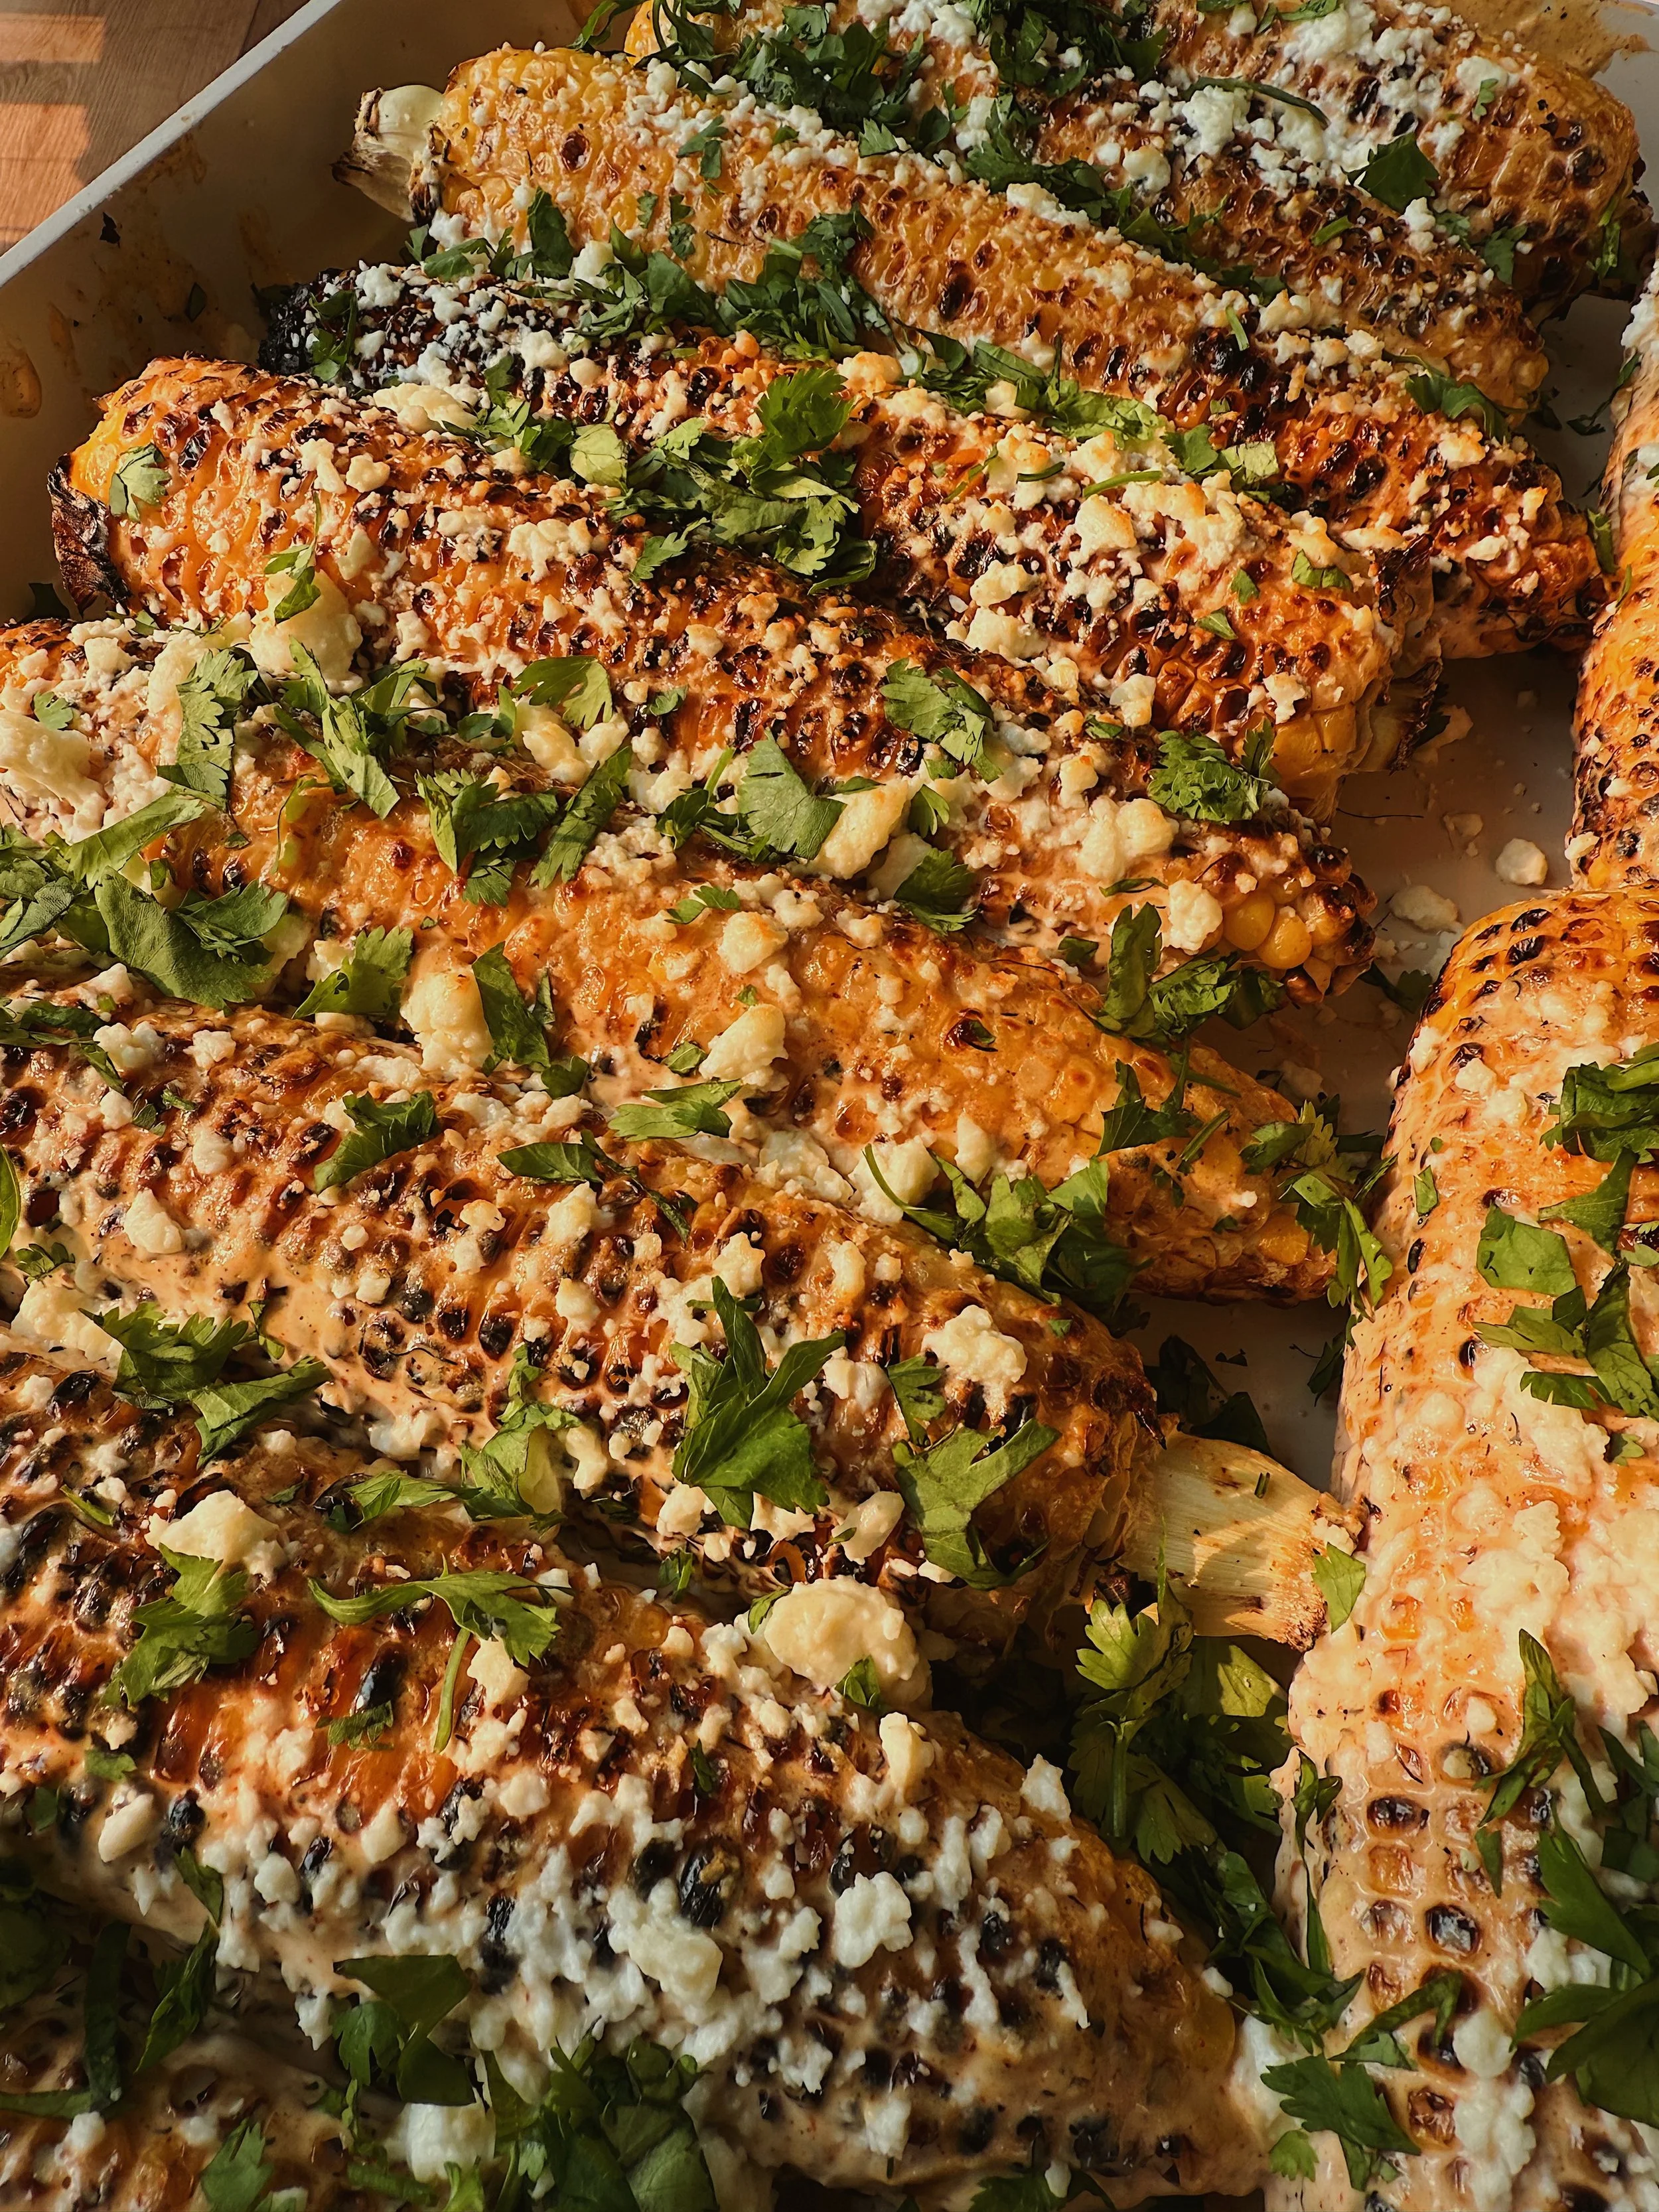
5.    Brush or spoon the crema generously over each hot grilled corn cob.
6.    Sprinkle crumbled cotija or feta cheese evenly over the coated corn cobs.
7.    Place the corn under the broiler for 2–3 minutes, watching closely, until the cheese softens and slightly browns.
8.    Remove from broiler and immediately sprinkle with chopped cilantro and dust with extra chili powder and other toppings if desired.
9.    Serve hot with lime wedges for squeezing over the top.

Optional Dip Version

If you’d rather enjoy this as a dip, follow the same recipe but slice the grilled corn kernels off the cob after step 3. Toss the corn with extra crema (to desired creaminess), half the cheese, and half the cilantro. Spread into a broiler-safe dish, top with remaining cheese, and broil until the cheese softens and browns. Garnish with cilantro, green onions, jalapeños, and extra chili powder. Serve warm with tortilla chips or as a side dish.


Enjoy!! 

Anna's Basket — Niagara Cherry Pie Cocktail

Niagara Cherry Pie Cocktail


This week we’re mixing things up a little with a summery cocktail that celebrates cherry season here in Niagara. We’re using fresh local cherries and mixing them with the smooth, almond flavour of Disaronno to bring out that classic cherry pie taste, just like our pies at The Red Barn. Instead of a traditional simple syrup, we’ve used a honey-sweetened version that’s light on water and big on fruit, letting the natural cherry flavours shine through. It’s cherry pie in a glass – sweet, simple, and straight from the farm. We hope you enjoy it as much as we did!

INGREDIENTS

Cherry Simple Syrup:
4 cups fresh Niagara cherries (stems removed)
1/2 cup water
1/4 cup honey
1 tsp pure vanilla extract

For the Cocktail (per serving):
2 oz Disaronno
2 oz cherry simple syrup (see above)
0.75 oz fresh lemon juice
1 oz whiskey (bourbon or rye)
Ice

Garnish: lemon slice + fresh cherries


Cherry Simple Syrup: 
In a small saucepan, combine cherries and water. Bring to a simmer and cook for 10-15 minutes, gently mashing the cherries as they soften. Remove from heat, stir in honey and vanilla. Strain through a fine mesh sieve. Store in the fridge for up to 1 week.

Cocktail:
In a cocktail shaker, combine Disaronno, cherry syrup, lemon juice, and whiskey.
Add ice and shake well for 15 to 20 seconds, until fully chilled.
Strain into a glass filled with fresh ice.
Garnish with a lemon slice and a couple of fresh cherries.

Optional twists:
Add a splash of soda water for a spritzier version

A non-alcoholic option:
Our cherry honey syrup isn’t just for cocktails – it makes a perfect summer refresher, too. Try it mixed with chilled steeped green tea and a splash of lemonade over ice for a bright, fruity drink on a hot summer day.


Enjoy!! 

Anna's Basket — Zucchini Boats

Grilled Zucchini Boats with
Fresh Tomato-Basil Bruschetta & Feta


I’ve been making this tomato-basil bruschetta topping since I was a young teenager living at home in my parent’s house. It’s one of those simple, nostalgic recipes that brings me right back to summer evenings in the kitchen after a long day on the farm. My dad would sometimes come home with loads tomatoes and garlic from a farmer friend and we would get to work transforming these simple ingredients into a family favourite dish.

Here, I’ve paired it with smoky, grilled zucchini boats for a light and vibrant dish, but the topping is incredibly versatile! We’ve enjoyed it on crusty sourdough or even as fresh topping on some grilled fish. It’s one of those recipes that’s hard to recreate in the winter when the ingredients aren’t straight from the farm, so I highly suggest adding it to your summer rotation. Enjoy!!


INGREDIENTS


For the grilled zucchini boats:
3 medium zucchini, halved lengthwise
1–2 tbsp olive oil
Salt and pepper, to taste

For the bruschetta topping:
1 cup ripe tomatoes (cherry or grape), finely chopped
1-2 garlic cloves, minced
2 tbsp olive oil
1 tbsp of balsamic vinegar
1–2 tbsp finely diced purple (red) onion
1 handful fresh basil leaves, chopped
Salt and pepper to taste

For serving:
¼ cup crumbled feta cheese (or more to taste)
Optional: Balsamic Glaze
Optional: broiler for finishing


Prepare the zucchini boats by slicing each zucchini in half lengthwise. Use a spoon to gently scrape out the seedy centers, creating shallow boats. Brush the cut sides with olive oil and season lightly with salt and pepper.

Heat a grill or grill pan to medium-high. Grill the zucchini cut-side down for 2–3 minutes, then flip and grill another 2 minutes, until tender with visible grill marks. Set aside.

In a bowl, mix the chopped tomatoes, garlic, red onion, basil, olive oil and balsamic. Season with salt and pepper to taste and let sit for 5 min or so for the flavours to develop.

Assemble the boats. Spoon the tomato mixture into each grilled zucchini boat. Top generously with crumbled feta.

Optional: Finish under the broiler. Place assembled zucchini boats on a baking sheet and broil for 1–2 minutes, just until the feta begins to brown slightly and tomatoes warm through. Watch carefully to avoid over-browning.

Serving Suggestions:
- Serve warm or at room temperature
- Drizzle with a little extra olive oil or balsamic glaze for added depth

Note:
If you're not a fan of zucchini or don't have a grill, the bruschetta topping also goes wonderfully spooned over a piece of crusty sourdough bread. Top with feta and lightly toast for a delicious app or side.

Enjoy!! 

Anna's Basket — Strawberries, Rhubarb, Honey & More!

Strawberry Rhubarb Compote


We’re calling this a compote since it’s looser than a jam and doesn’t have any added artificial pectin. I love rhubarb here because it’s naturally very high in pectin, so it still sets up, despite using honey which is a liquid sweetener. 

I always have a few jars of this on the go at this time of year. I love that it’s naturally sweetened with honey and the kids love it on yogurt for a healthy breakfast or snack. That being said, when we’re looking for a special, sugary treat, we spoon some on to vanilla ice cream and it never disappoints! 

Letting the rhubarb sit in the fridge for a few days with the honey is an important step, so don’t be tempted to skip it!  It really mellows the tartness of the rhubarb and the two flavours marry together perfectly. 


INGREDIENTS


4 cups rhubarb chopped 
1 cup honey 
1 quart strawberries washed and sliced 
2 tsp lemon juice (or more to taste) 


Place 4 cups of chopped rhubarb in a 1L mason jar or any other container. Cover with 1 cup of honey. Place in the fridge for 2 days or so, I’ve let mine up to 5. You’ll notice that more juices start to release as it sits. 

When the rhubarb has sat and is ready to go, wash and slice 1 quart of strawberries. 
Add the rhubarb/honey mixture and strawberries to a medium saucepan and cook over medium/high heat until it comes to a boil. Lower heat to medium and continue cooking at a rolling boil for 5 min or so, be sure to stir regularly. You may need to skim some foam off the fruit with a spoon at this point. Add lemon juice and remove from heat. 

Note: You’ll be able to see that the mixture starts to thicken as it cooks. The cooking time may need to be adjusted depending on how juicy the strawberries are, so if it’s looking too runny you can cook it down a bit more. It will still be loose, but as it cools it will set up! 

I ladle the compote into glass jars when it’s still hot and store it in the fridge. You can also freeze it if you won’t use it all within 2-3 weeks, however, we never run into that scenario over here. 

Here’s our favourite way to enjoy this compote, we highly suggest adding this to your breakfast rotation. 
Yogurt Bowl: 
A scoop of your favourite yogurt 
A few spoonfuls of strawberry rhubarb compote 
Fresh strawberries or whatever seasonal fruit you like 
A handful of Red Barn Granola 
Drizzle of honey
 

We have a few kids who love to add a spoonful of natural peanut butter to the mix as well. It’s really just open to interpretation. 

Enjoy!! 

Anna's Basket — Asparagus

Asparagus Tart with Herbed Goat Cheese,
Prosciutto & Hot Honey


Asparagus is one of the first spring vegetables grown here in Southern Ontario. Seeing that first local asparagus on the shelves always brings the anticipation of long, warm summer days. It’s a versatile veggie, and while it’s lovely simply roasted or sautéed, it’s also fun to mix it up!

Come pick up some asparagus and honey and bring this app to your next get together.


INGREDIENTS

1/4 cup honey
1/2 - 1 tsp crushed red pepper flakes 

2 10”x10” squares of all butter puff pastry (PC brand from Loblaws makes a great one) 

1 tbsp butter
1 medium yellow onion finely sliced
1 large clove garlic minced 
Optional * 2 tbsp white wine 
300g of herbed goat cheese
1 egg
1 tsp fresh lemon juice 
1/2 tsp salt 
1/4 tsp pepper 

1 lb asparagus 
1 tbsp olive oil 
Squeeze of a lemon (1/2 tsp or so) 

6 slices prosciutto 
Flaky salt  


Combine the honey and pepper flakes and let it sit for a few hours. For best results, do this a day or two in advance. Use whatever crushed peppers you like, I used a combination of alleppo and crushed red pepper flakes. 

Remove puff pastry squares from the freezer to thaw. 

Preheat oven to 425. 

Heat a skillet over medium heat with a tablespoon of butter. Add one onion thinly sliced and one minced clove of garlic. Lightly season with a pinch of salt and pepper. Sauté for 10 minutes or until onions are soft and golden brown. If you happen to be having a glass of white wine while cooking, deglaze the pan with a splash of white wine. 

In a small mixing bowl combine a 300 g brick of herbed goat cheese with the warm onion and garlic mixture, egg, salt and pepper and lemon juice.

Spread goat cheese mixture evenly over two square sheets of puff pastry, leaving the edges exposed so they can puff. 

Snap the tough ends off your asparagus. If asparagus is thick, slice each piece in half lengthwise. Toss in olive oil and a little squeeze of lemon juice. 

Layer the asparagus over the tart however your heart desires. 
Optional - brush edges of pastry  with a beaten egg wash. This helps the pastry get a crispy, golden edge. 

Bake for 30 minutes or until the bottom and edges of the pastry are golden brown. 

Remove from oven and top with prosciutto and drizzle with hot honey and a little sprinkle of flaky salt. Serve warm.

Note ** This recipe makes 2 smaller tarts because I like to feed a crowd. I’d recommend making both or putting the pastry side by side and making one larger, rectangular tart. However, if you’d only like to make one small tart, you can divide the recipe in half and since dividing an egg is tricky, you can stick with one egg.

Granola, and milk!

It's been a long time coming, but here it is, our first blog post. Let's talk granola. We have been wanting to develop a granola recipe for some time now and have been testing (read: eating) countless amounts of granola recipes and variations over the past couple of years. A recipe was finally agreed upon, one that we were proud to put our name on.

A granola with wholesome ingredients and no shortcuts. 

Whole rolled oats and a mix of nuts are common ingredients to many granolas and this one is no exception. But to achieve that light crunch and perfect sweetness, we used an excellent olive oil and pure maple syrup (thanks White Meadows!). Through our experiments we tried a number of sweeteners, but nothing gave that same perfect, sweet flavour and consistency as 100% pure maple syrup. The beautifully flavoured amber syrup we use for the granola is available in our market, but you could also head down the road into Fonthill and get a tour of the maple farm for yourself! 

It was also exciting bumping into Marianne den Haan this past winter at the OFVC convention to chat about farming and life. Marianne and her family run Sheldon Creek Dairy and we are thrilled to have their farm fresh dairy products on our shelves. We highly recommend pairing the granola with this delicious whole milk and fresh berries. 

Our granola intentionally does not contain any dried fruit. We want those buying our granola to top it with seasonal, fresh Niagara fruit. The combinations shown here are strawberry + raspberry in one bowl and black currant + sweet cherry in the other. Trust us, with such beautiful fruit available only for a short while, now is the time to take advantage of the bounty!

We are very proud of this granola, and want to give you all a taste. Get a free mini cup of granola with every purchase tomorrow, Saturday only (July 18!). While supplies last. 

An introduction, hello.

Welcome to our site, and more specifically, our blog. Here we hope to share an abundance of information in hopes of encouraging and enabling you to experience more of the goodness found right in our backyard, Niagara. We hope to share stories from the farm, recipes and information on other inspiring purveyors of Niagara farmland. 

We call ourselves The Red Barn. We've quietly transitioned from our original name of Tigchelaar Berry Farms Market but anyone familiar with our family will notice many of the same faces, the same recipes and most importantly the same strawberries. 

The incredible bounty of our region coupled with the careful attention of all who tend to this land enables us to provide something truly beautiful. Ultimately our desire is to share all that the family farm means to us. We invite you to follow us on our journey while we continue to grow and build our dreams.